- Details
- Written by: Mike Walker
„Keeping it sharp
Climbing and walking in the mountains isn’t always the fastest action to try and capture, but for a sharp result – and to avoid any blur caused by shakiness in your hands – keep shutter speeds high (probably 1/250 sec or faster), using a high ISO setting if necessary. A relic from pre-digital camera days, ISO now describes the sensitivity of the sensors. A high ISO means that less light needs to be let into the camera, so the aperture can be smaller and the speed faster. Many cameras can still deliver great images at 800, 1600 or higher ISOs.

Problem solved Here using a high ISO I managed to keep the detail of the rocks despite taking a hand-held shot.
ƒDarks and lights
Mountains often present extreme lighting conditions, perhaps with sunlit snowfields above deep shadowed valleys. This can give fantastic images, but we often have to choose between ending up with areas of dead black or pure white. Cameras with larger sensors (physically larger, rather than boasting more megapixels) handle extremes of brightness (‘dynamic range’) much better. Large sensors are mostly found in digital SLRs and the newer breed of compact system (‘mirrorless’) cameras like the Olympus OM-D models and Fuji X-series. Take a look at the Olympus OM-D EM-5, for example (c£760 with lens).

Problem solved One possible solution to this problem is to shoot several images at different exposures (this is known as ‘bracketing’, to capture detail in both highlights and shadows. These can be combined later. Many cameras (and even some phones) can do this automatically. Otherwise there’s lots of software that can merge the images for you afterward: I used EasyHDR.com, for this shot.
The size of a mountain
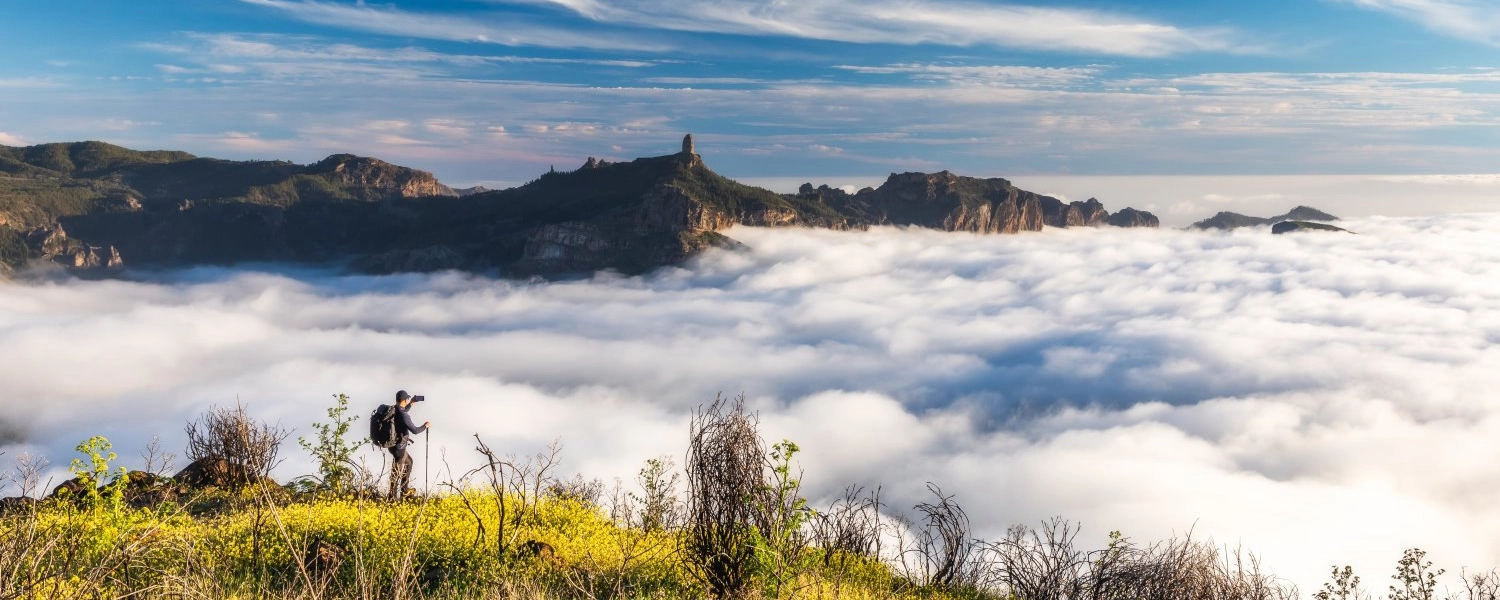
Mountains are big. Maybe that goes without saying, but it poses a challenge: how do you convey that sense of vastness?

Problem solved Often, a point of reference or comparison – like this tiny figure in the foreground above – helps the viewer grasp the scale. They can also give a better sense of connection, making that landscape real and three-dimensional – a place to be, rather than just a backdrop. In big landscapes, a wide-angle lens 24mm-equivalent or wider is extremely useful. This is something compacts and smart-phones often lack, though you can sometimes compensate by ‘stitching’ several images together – a function that even some smartphones or apps have.
Practical Tips
Hand in (and out of) glove
Wearing thick gloves to keep out the cold is not always compatible with pressing buttons and taking gloves off in the mountains is risky.

Problem solved In extreme cold, I’ll wear silk inner gloves to protect my hands when I need to slip thick gloves off to change settings. As much as overall thickness, it’s the placement of seams in the fingertips that can make gloves a pain when accessing camera controls – so take your camera with you when you try out new gloves. Conversely, if you’re looking for a new camera, then take gloves with you.
Charge!
On long trips you may worry about batteries running out and leaving your camera useless.

problem solved There are several ways to conserve batteries: be more selective of what you shoot; use the viewfinder to frame your shots, not the screen; minimise screen preview time. I prefer to carry one or two spare freshly charged batteries rather than worry about re-charging in the hills. If you’re intending to shoot video with your digital camera, then you’re going to drain the battery much faster anyway, and you’ll need a lot of spares or a battery pack.
Loose Canons
Something as simple as how you carry the camera can be critical. It’s a compromise between accessibility, security, and your balance. Cameras slung over shoulders are also easily bashed.

problem solved Even on straightforward walks I use a dedicated pouch on a waist-belt. When I need loads of gear for a professional shoot I’ve got a dedicated Loka backpack (Manfrotto also do a huge range of camera bags) but time can still be of the essence and I’ll always have one camera in the waist-pouch.

